How To Spellcheck Scans & Images [TUTORIAL]

Checking your documents and writings for mistakes regarding spelling and grammar is easily done online. All you have to do is paste the text you want to check into a web service like Online-Spellcheck.com and wait for it to be checked. Of course documents can be checked as well. When you’re writing an article or essay in Microsoft Word or OpenOffice, you can easily upload your DOC, DOCX, ODT, RTF or TXT document and get a thorough check. Even PDF text documents work!
What if you have a file that contains scanned pages though? Or even worse: an image containing text?
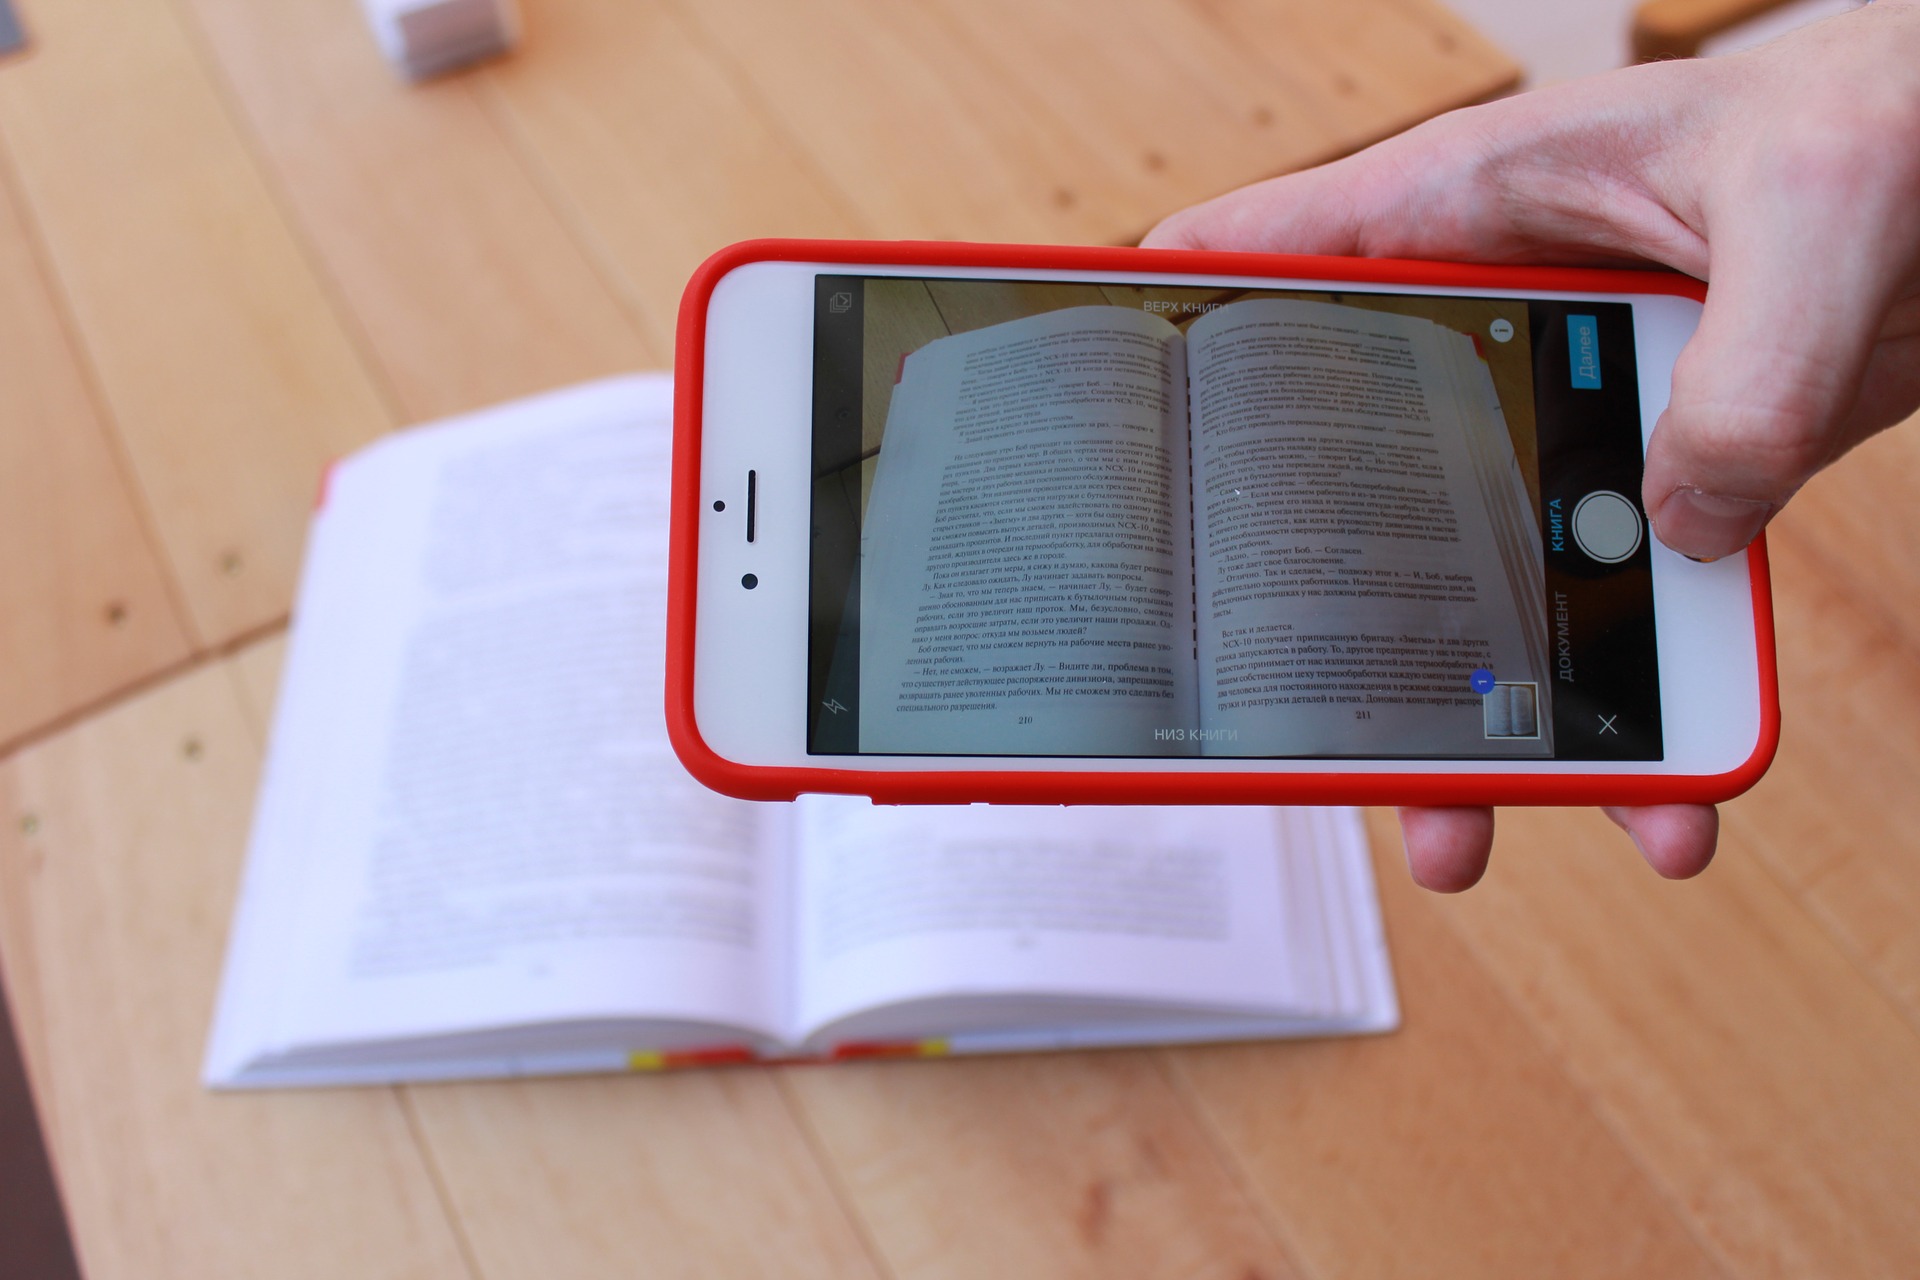
Online-Cpellcheck.com can check text on an image as well. Thus, when you scanned a document as an image or snapped a photo of a PowerPoint slide, for example, you can check it for spelling and grammar mistakes as well. Following, we will show you how this is done – step by step and for free.
How To Check An Image For Spelling & Grammar Errors
Following, we will give you a step-by-step how to on spellchecking a (scanned) image. This means that you’d need your scans in an image format (instead of PDF) such as:
- JPG, JPEG
- PNG
- GIF
- TIF, TIFF
Of course this list is not exhaustive. The most common image formats are supported.
But enough talk, on to the tutorial. By the way: this also works from mobile!
1. Go to www.online-spellcheck.com.
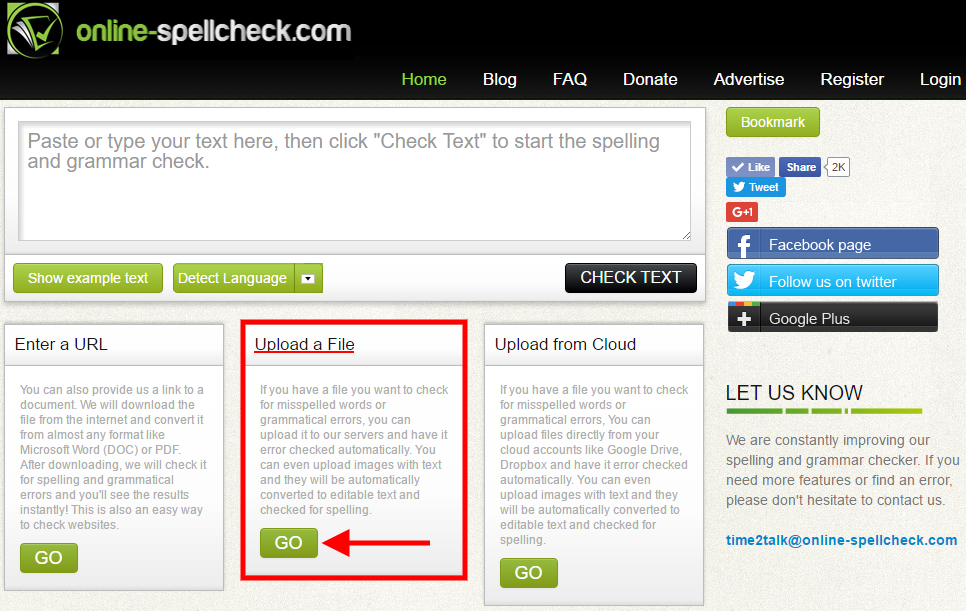
2. Find the part where it says “Upload a File” and click on “Go”. This will bring you to the following page: Spellcheck A File.

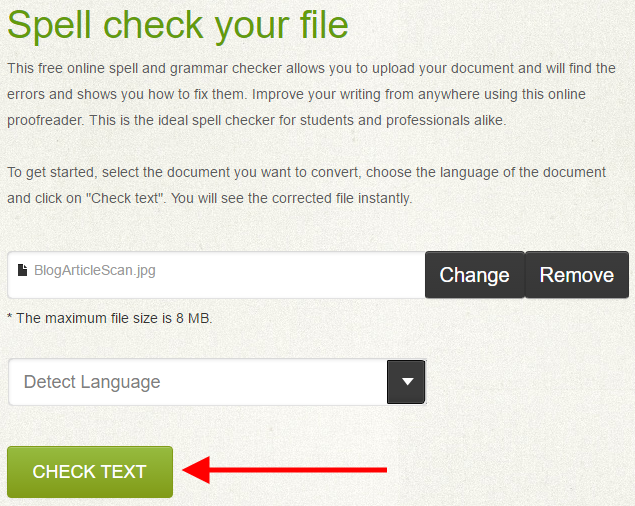
3. Browse your device or hard drive for the image file you want to check. Keep in mind that the maximum file size allowed for the upload is 8 MB. In case the result of the grammar and spelling check is dissatisfying, you can improve the result by setting the language. This is optional and as a default, our system tries to detect the language itself.
4. Click on “Check Text”.

5. Give the service a bit time to upload your image and convert it into a text that can be checked. This will be done quickly, depending on the file size of your image.
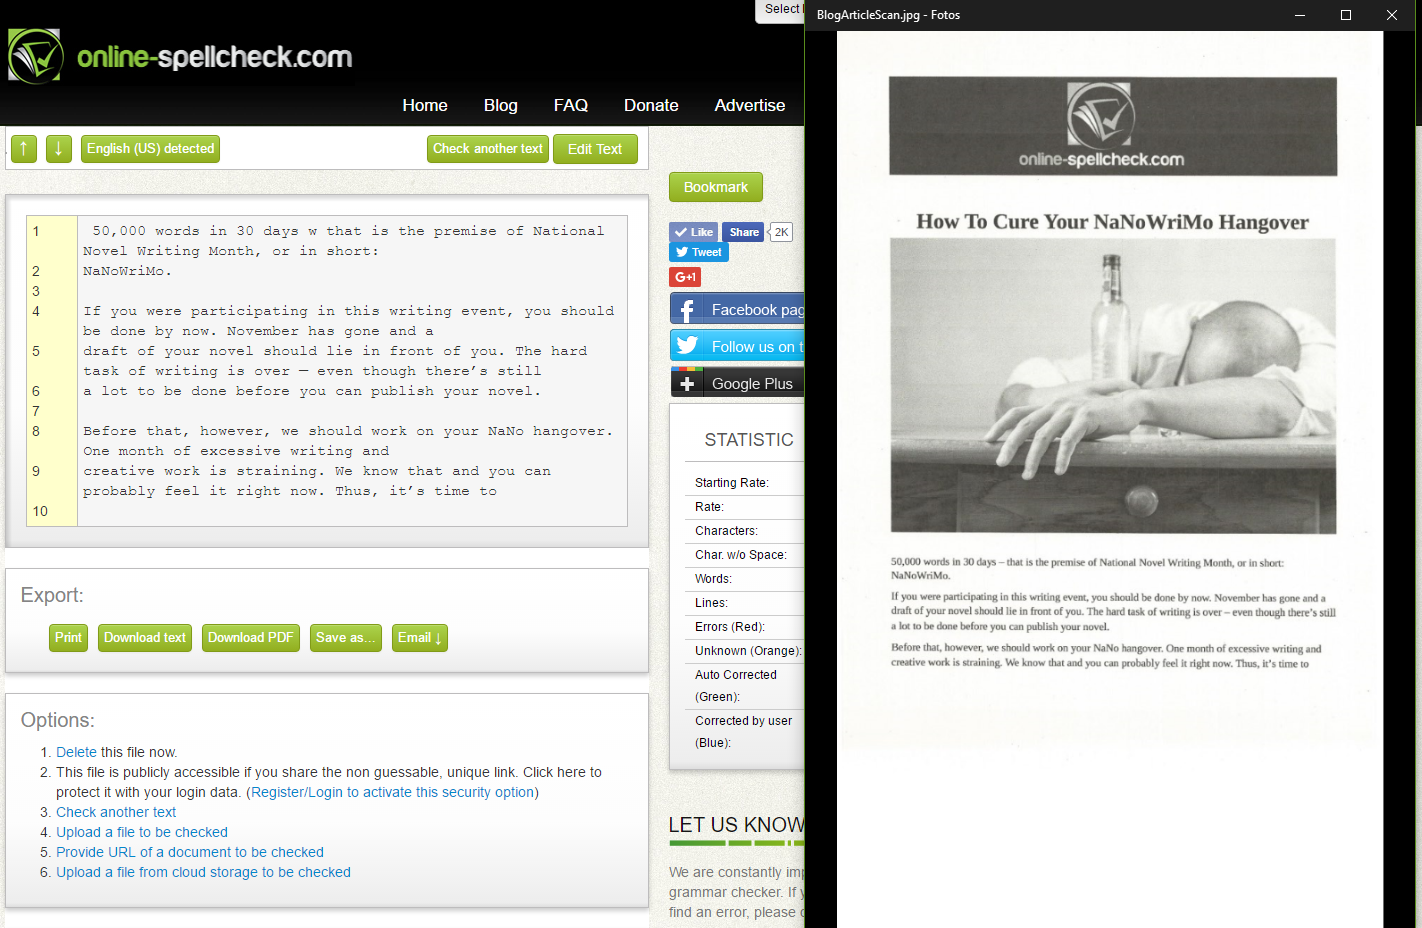
6. Check the result. As you can see below, the tool was able to interpret the text of our scan (right). The only thing missing was the en-dash.
7. If you correct some errors or want to change conversion errors like the –, you can click on “Edit Text” and make your according changes before checking the text again.

Et voilà! Now you have a thorough spellcheck including a grammar check for the text in your image! Neat, isn’t it? ?

