3 easy Steps to Spell Check Documents
A good online spell checking tool should provide you with a number of ways to check your texts and writings. Next to typing it into a textbox or having to copy it, there should be an option that allows you to simply upload any document file and get your writing checked! This is possible by using our service, and I want to present you the 3 easy steps on how to spell check documents quickly and effectively!
1. Upload your Document
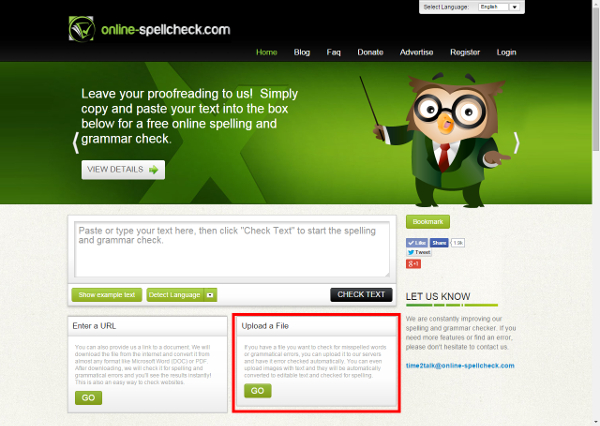
When you are on the main page of the Online Spellchecker, you will find a box that says “Upload a File” underneath the big textbox. Simply click on go since this is the method we want to use here.
From there, you will be redirected to a page where you can browse for the document you want to get checked on your computer or mobile device. It doesn’t matter in which format you have saved your text since the online spell checking tool can process Micorsoft DOC documents as well as PDF, TXT, or OpenOffice naive ODT files.
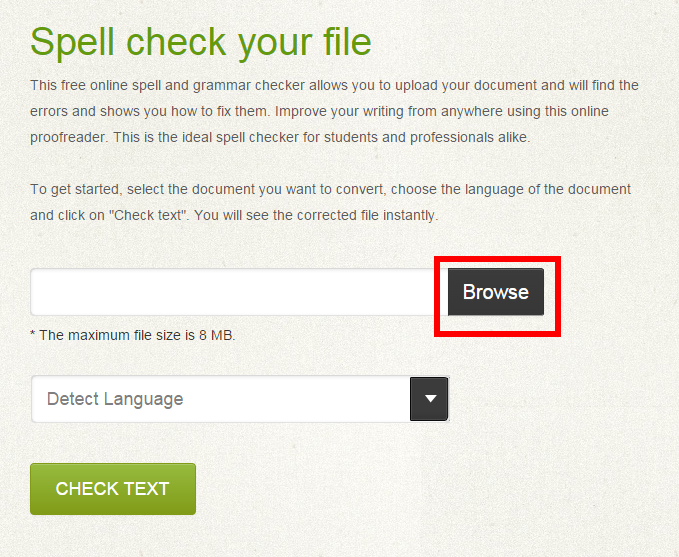
Once you selected your file, you can choose in which language it is written. The standard setting is “Detect Language” which means that the Online Spellchecker will find out what language your text is written in itself. Afterwards, simply click on “Check Text”.
It will take a short time for your document to be uploaded, converted into a format our Spellchecker can work with, and until the language is detected.
2. The Result
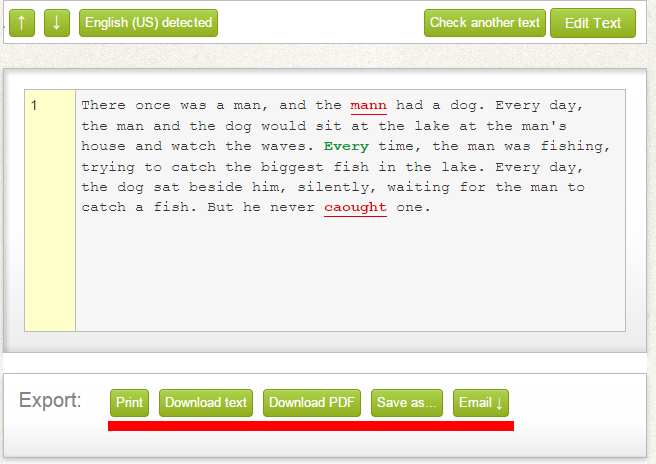
The website will immediately forward you to your checked and corrected text. An overview of what the different colors used to mark mistakes or suggestions in the text mean can be found at the end of one of our previous articles. Depending on how many mistakes you made – aka on how colorful your text is – your result will look roughly like this:
3. Getting the Result
Now that the text is checked, there are a few options of what you can do with your result. Of course you could look at the result and browse through your text and correct the mistakes there, but there are some more convenient ways, of course.
Easy to explain, the “Print” button will let you print the result of your spell check. If you print in color, the mistakes will be marked in the same color as they are in our result as well.
Download the Result
By clicking on one of the download buttons, either “Download text” or “Download PDF”, a download of your corrected text will start immediately. When choosing the first option, the result will be downloaded as a TXT file, with the second, apparently, as a PDF.
Note: Mistakes that are only indicated by the Spellchecker have to be corrected by the user before downloading!
By clicking “Save as…” an even larger variety of document file formats will be available for your download by redirecting you to an online file converter. There, you simply choose your desired file format from the list.
And last but not least, you can request to receive the checked test via email. This is especially useful for users on a mobile device or when you want to access the spell checked text from another computer.
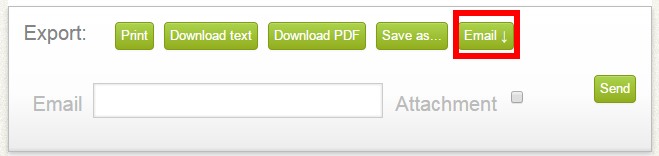
Clicking on the “Email” button will open the menu shown above. There, you simply add your valid email address into the field. If you hit send right away, you will get the corrected text in an email message. Ticking the box behind the option for Attachment will add your result to the email as a TXT file.